Want to create and show an events calendar on your WordPress website, then you’re on the right page.
If you run a business or an organization that hosts events and people are interested in attending them, how can you inform them about the events? Well, the easiest way to inform people about upcoming events at your organization is to add an events calendar to your organization’s website, which will let people know about the events at your organization as well as get all the essential information about the events.
Adding an events calendar to your website will not only help you add more value to your website for customers, but it will also assist you in interacting with your customers, creating and increasing brand awareness, and improving your search marketing campaigns.
To add an events calendar to your WordPress website, there are many plugins that help you with that, including The Events Calendar, Timetable and Event Schedule by MotoPress, and Modern Events Calendar.
The Events Calendar is the #1 WordPress events calendar plugin that has been installed more than 800,000 times and powered over one billion events. Hence, we are going to create an events calendar using The Events Calendar plugin.
Before we dive in, let’s get to know what The Events Calendar plugin is and what it has to offer.
Table of Contents
A Brief Introduction to The Events Calendar Plugin
The Events Calendar is the most popular and specialized WordPress plugin used to create and manage events and an events calendar on your WordPress website.
The plugin is available for free, including all the essential features to create and organize events and customize the events calendar view. The advanced features come with the Pro version, starting at $99/year.
The plugin comes with an easy-to-use interface; even beginners and non-technical users can create and manage events and an events calendar on their WordPress sites themselves.
It also easily integrates with other valuable plugins, like the Event Tickets plugin which allows you to sell tickets and collect RSVPs on your website for free.
The Events Calendar plugin has been installed more than 800,000 times and has 4.3 out of 5 star ratings based on 2,220 verified reviews. Quite Impressive!
Features of The Events Calendar Plugin
The Events Calendar offers several features, such as:
- Customization: You can create the exact events calendar you want or that matches your website’s look and feel directly from your WordPress website.
- Subscribing to Your Calendar: Users can subscribe to your events calendar to receive event updates through Google Calendar, iCalendar, and more.
- Time Zone Support: You can show the events in different time zones, such as your website’s timezone, the location time zone where the event will take place, or the time zone of the visitor (but it’s a little bit tricky).
- Multiple Views: You can show your events to users by day, month, or in a list. Each view easily, completely, and seamlessly integrates with your installed theme.
- Featured Events: You can create a featured event to give it a more prominent appearance in the calendar. It’s basically used for driving engagement and increasing attendance.
Quick Note: The above-mentioned features are free, while the below-mentioned ones are premium features.
- Recurring Events: The Events Calendar plugin allows you to create weekly, monthly, or custom recurring events as well as event series, making event creation and management much easier.
- Additional Views: In addition to all the standard views mentioned in the above section, you can display your events to users in a photo grid, summary, by week, or on a map.
- Shortcodes and Blocks: This feature lets you display event countdowns, highlight featured venues, and embed a calendar or an event anywhere on your website.
- Advanced Widgets: These widgets allow you to display a mini calendar grid view, featured venues, upcoming events, and event countdowns.
In addition, it offers a lot more features, including event status, premium support access, and Elementor widget compatibility.
Pricing
The Events Calendar plugin comes with FREE and PRO versions.
FREE Version
If you just want to create, display, and manage simple events or an events calendar on your website, then the free version of The Events Calendar plugin is more than enough for you.
The free version includes the following features:
- Month, day, and list view
- Complete Responsive
- Tags and Categories
- Event Status
- Subscribe with iCalendar, Google Calendar, and Outlook
PRO Version
If you want to create and display advanced events on your website, then you should choose the PRO version.
Here’s a list of advanced features that are included in the PRO version.
- Premium Support
- Recurring Events
- Custom Fields
- Elementor Integration
- Advanced Widgets
- Additional Calendar Views
- Event Manager
- Location Search
The Events Calendar offers five premium plans, such as: 1 Site, 3 Sites, 10 Sites, Multisites, and Unlimited.
| Aspects | 1 Site | 3 Sites | 10 Sites | Multisite | Unlimited |
|---|---|---|---|---|---|
| Price | $99/Yr | $199/Yr | $399/Yr | $399/Yr | $799/Yr |
| Premium Support | ✓ | ✓ | ✓ | ✓ | ✓ |
| Additional Calendar Views | ✓ | ✓ | ✓ | ✓ | ✓ |
| Recurring Events | ✓ | ✓ | ✓ | ✓ | ✓ |
| Elementor Widget | ✓ | ✓ | ✓ | ✓ | ✓ |
| Custom Fields Compatibility | ✓ | ✓ | ✓ | ✓ | ✓ |
| Advanced Widgets | ✓ | ✓ | ✓ | ✓ | ✓ |
| Location Search | ✓ | ✓ | ✓ | ✓ | ✓ |
| Events Manager | ✓ | ✓ | ✓ | ✓ | ✓ |
I recommend you select one of them that you can afford and that fulfills your needs. However, if you’re just starting out, then pick up the 1-Site plan.
Pros and Cons
Let’s take a look at the advantages and disadvantages of The Events Calendar plugin.
Advantages
- The plugin is available for free.
- It’s the most trusted events calendar plugin on the WordPress repository.
- It has a user-friendly interface, making event creation and management easier and quicker.
- Your events calendar looks responsive on desktop, tablet, and mobile devices.
- It allows you to show the event’s location through Google Maps.
- Advanced features are included, such as event countdowns, recurring events, advanced widgets, and much more.
- The plugin regularly gets updates.
- The plugin is completely customizable; you can create the exact events calendar you want.
Disadvantages
- Its premium support options are limited.
Now that you have an idea of what The Events Calendar is, let’s install and use it.
How to Install The Events Calendar Plugin on WordPress?
To add an events calendar to your site, let’s install The Events Calendar Plugin.
Click on the following button to download the plugin for free from the official source and then upload it from your WordPress admin dashboard.
You can also install it directly from your WordPress admin dashboard.
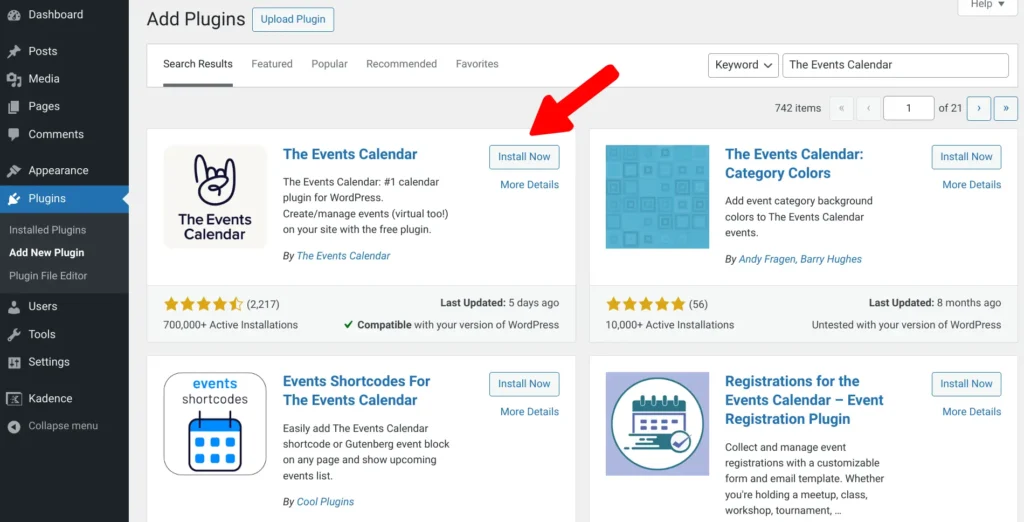
Simply log in to your WordPress admin dashboard and then navigate to Plugins ➡ Add New. Type The Events Calendar in the search bar, so you can see that the plugin has been displayed.
Click on the Install button.
Next, tap the Activate button.
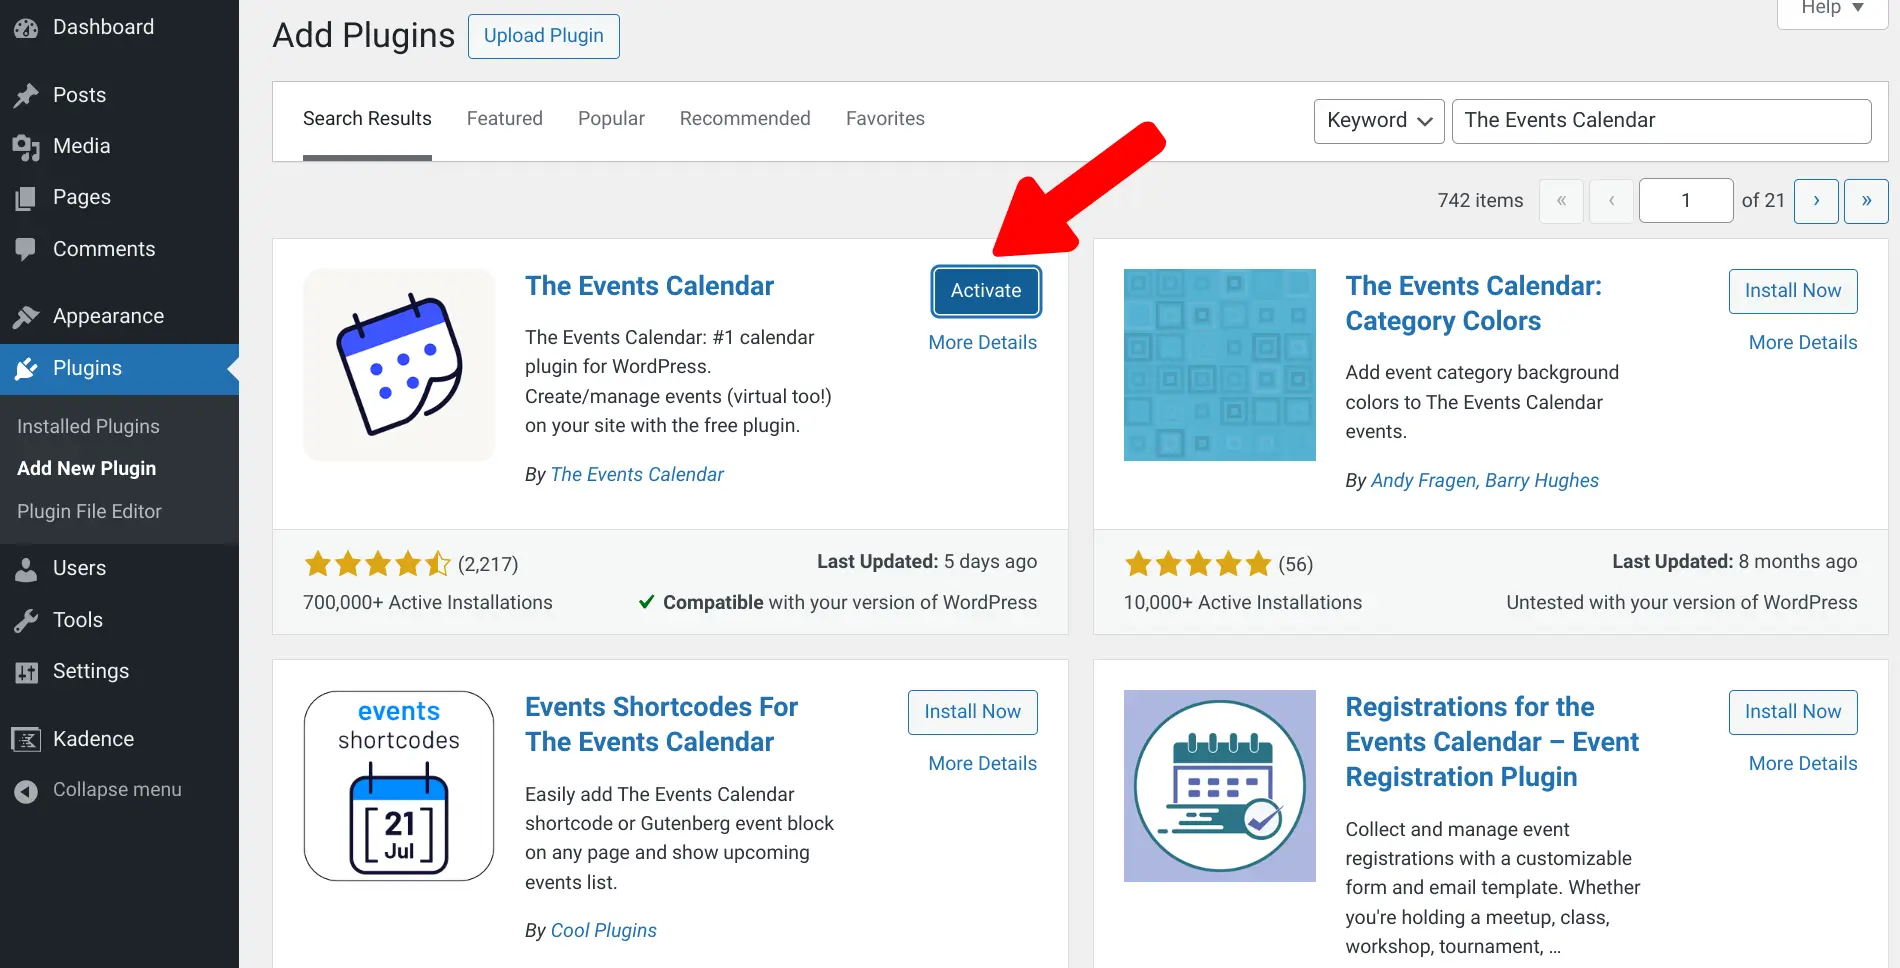
Congrats! You have successfully installed and activated the plugin.
How to Create An Event Category?
In the beginning, you should create categories for the events to categorize them.
To add categories, hover over Events and then click Event Categories from the left-side menu.

Next, enter the category name, slug and description.
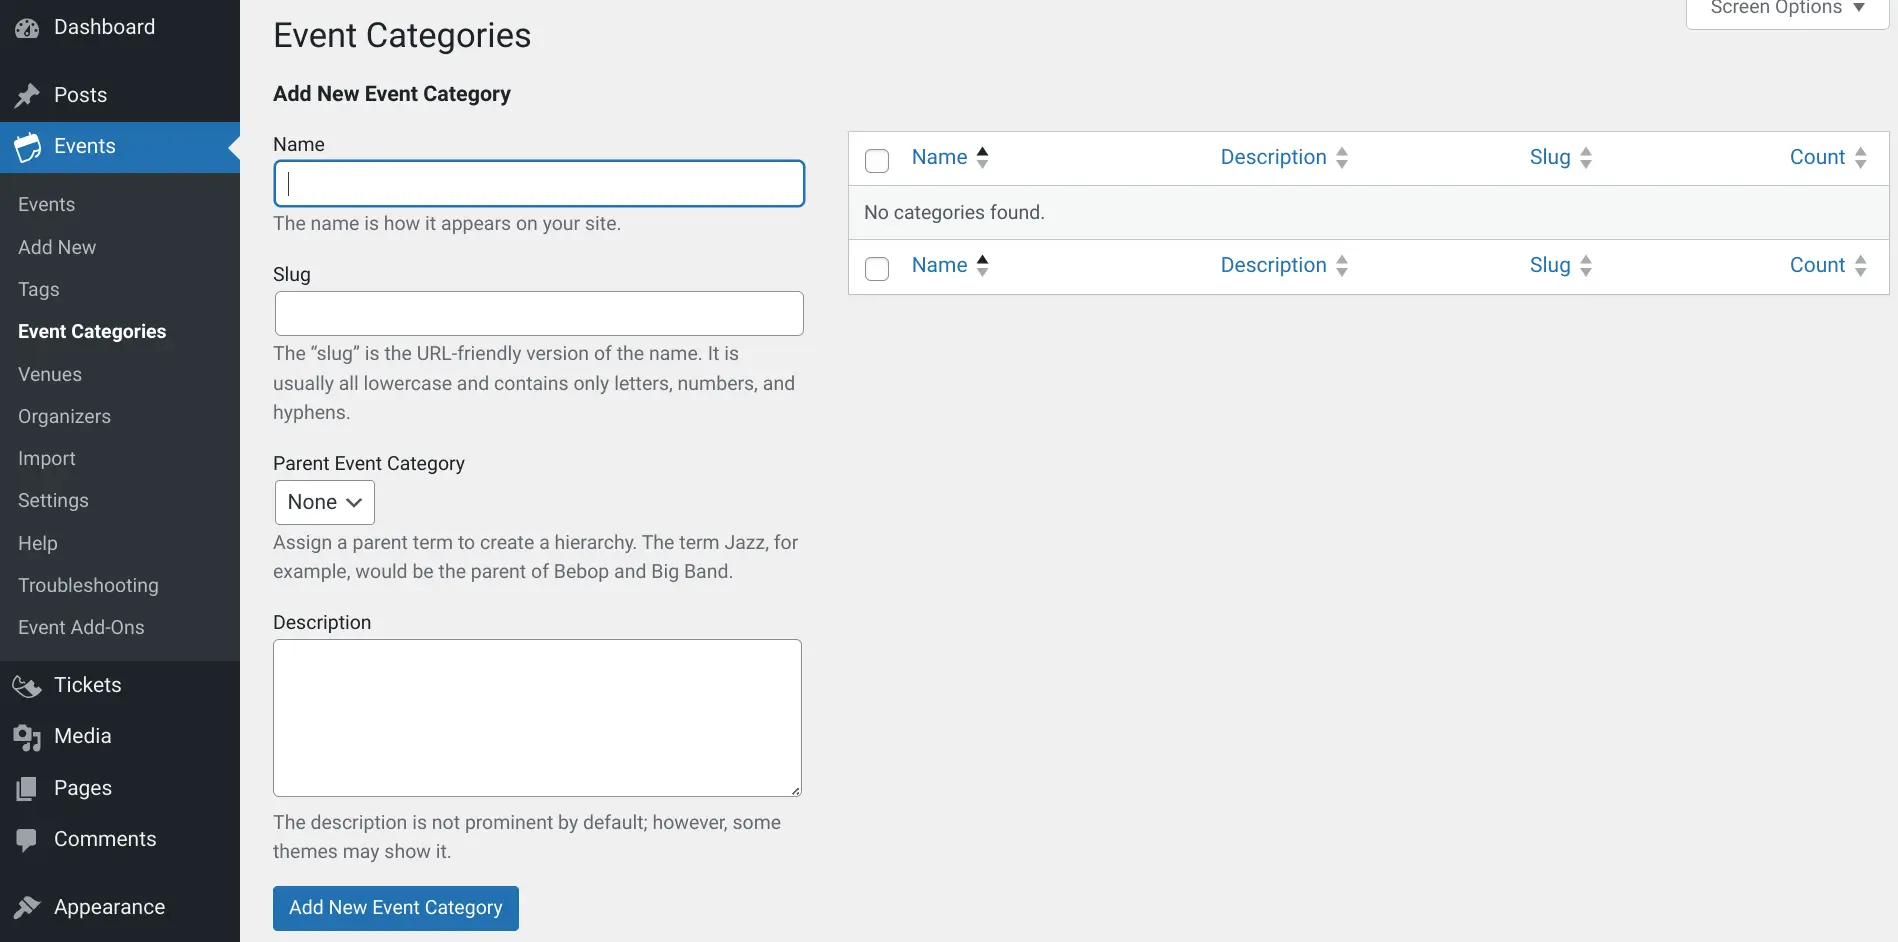
Once you enter these details, hit the Add New Event Category button. This will add a category that you can choose for your events.
How to Add an Event to Your WordPress Site?
As we have installed the plugin, it’s time to add an event to your WordPress site.
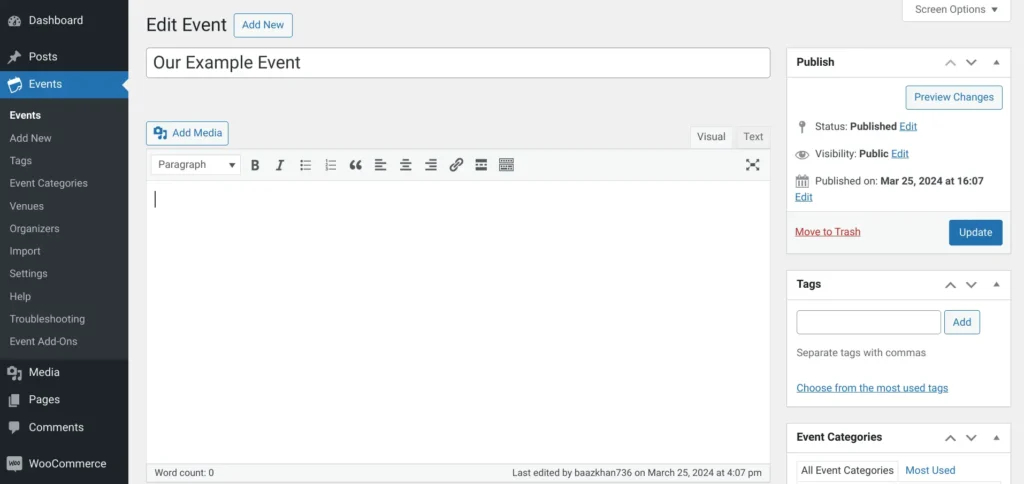
Simply hover over Events and then click the Add New button.
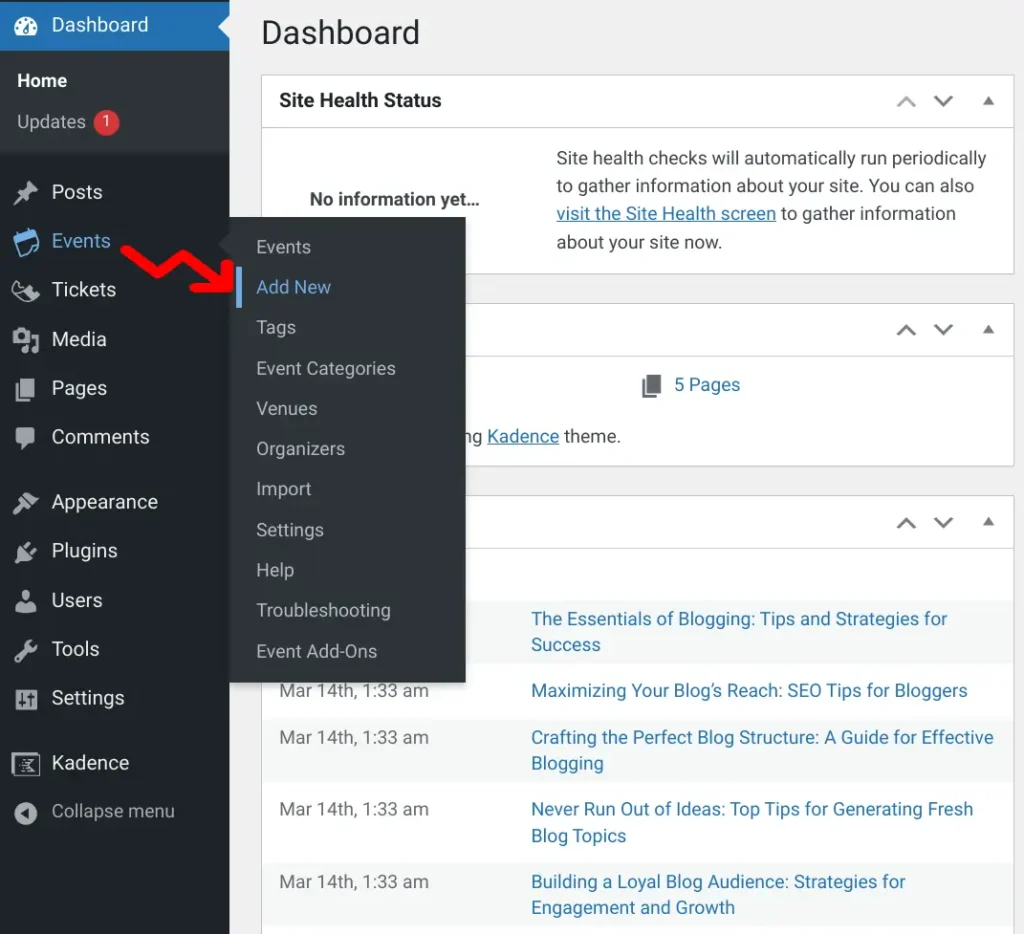
This will redirect you to a new window that allows you to enter all the details about your event; it’s similar to creating a blog post.
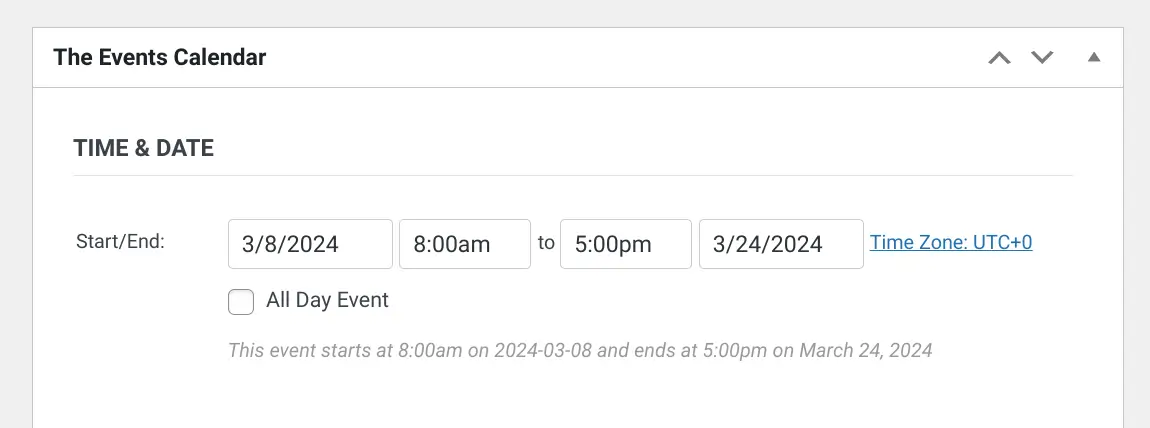
Once done, scroll down to the bottom and enter more details about your event, including:
- Start and End Date: Enter the start and end dates of the event.
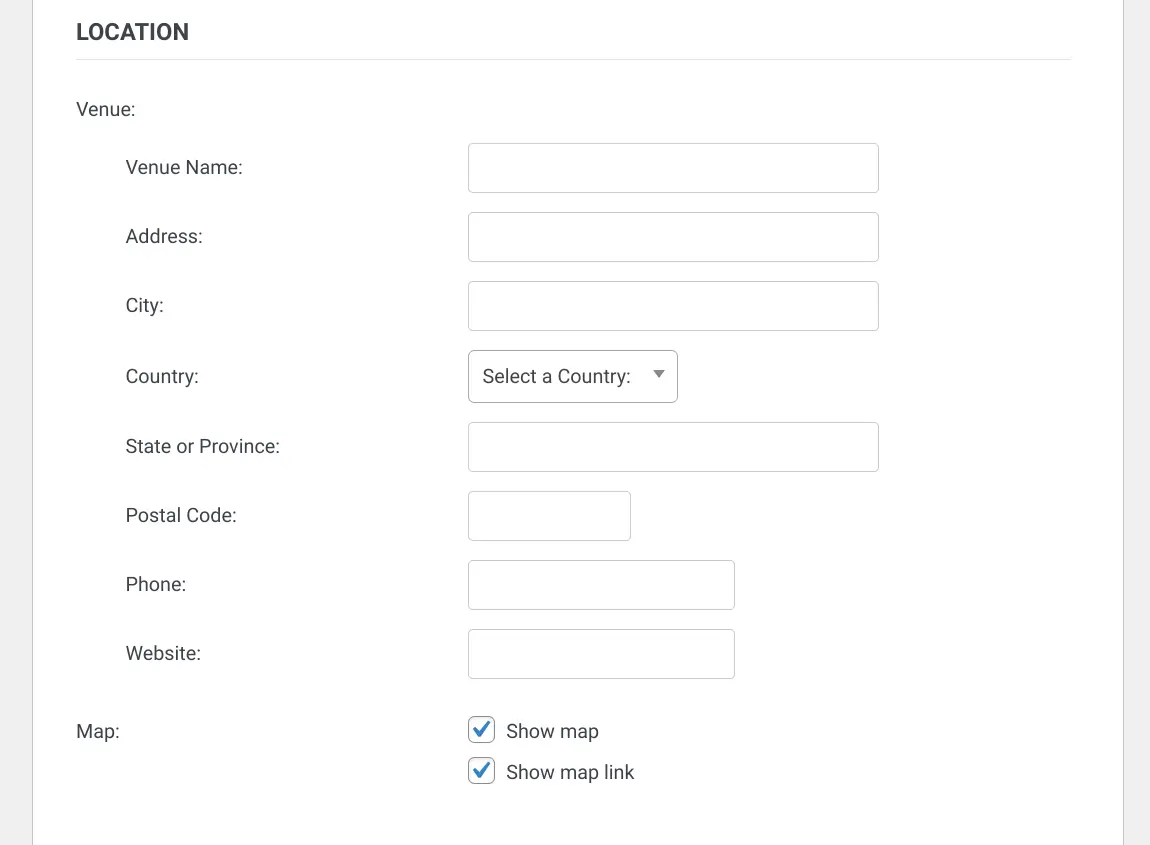
- Location: Enter the venue name, address, city, country, state, website, phone, postal code, and Google Map’s address link.
Quick Note: As you know that The Events Calendar Plugin integrates with Google Maps, enabling you to show the events’ location via Google Maps.
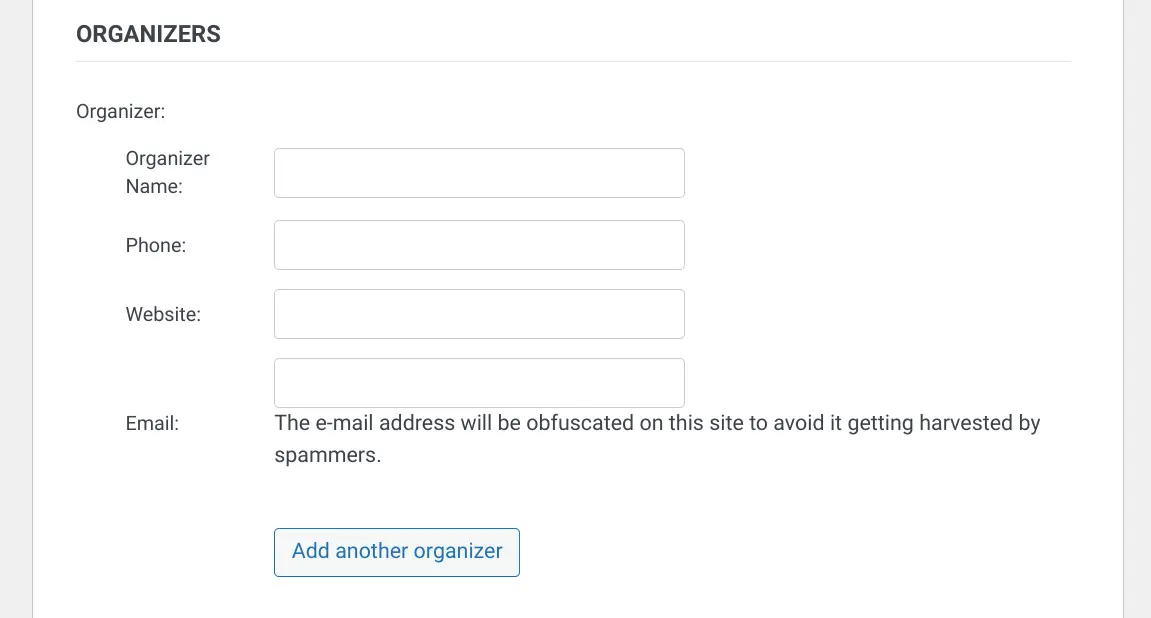
- Organizers: Within the Organizers section, you can select an already existing organizer and also create a new organizer.
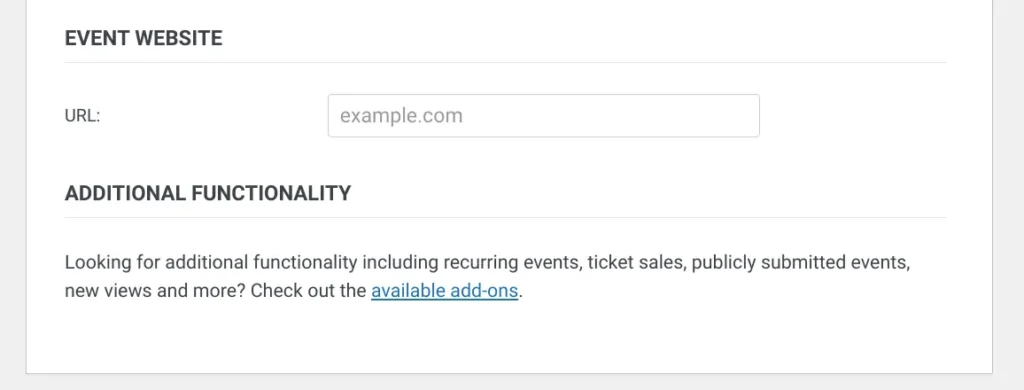
- Event Website: Enter the event’s website URL.
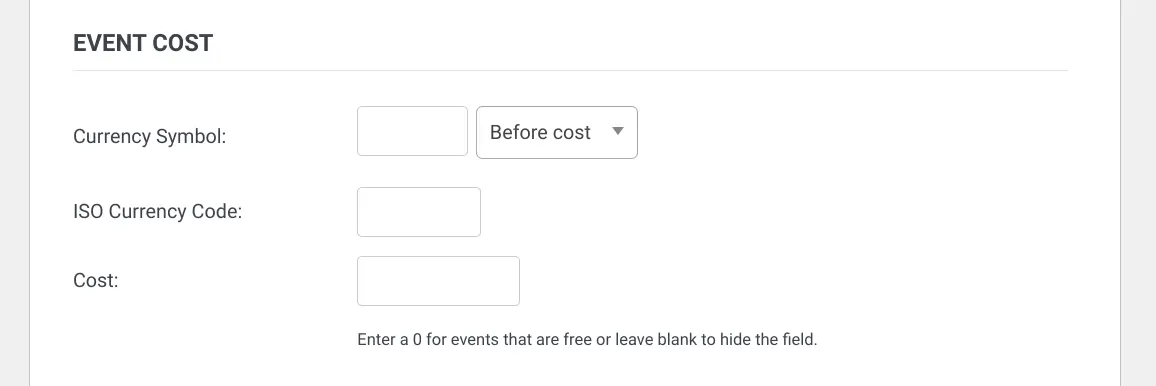
- Event Cost: You can set a price that will be paid out by the event attendees. Additionally, it allows you to show the currency symbol before or after the price.
Next, either choose a category from the list or create a new one from the left sidebar to categorize your events.
Once you enter all the details, click on the publish button from the left sidebar to show the event and event calendar on your WordPress site.
How to View the Events Calendar on Your Website?
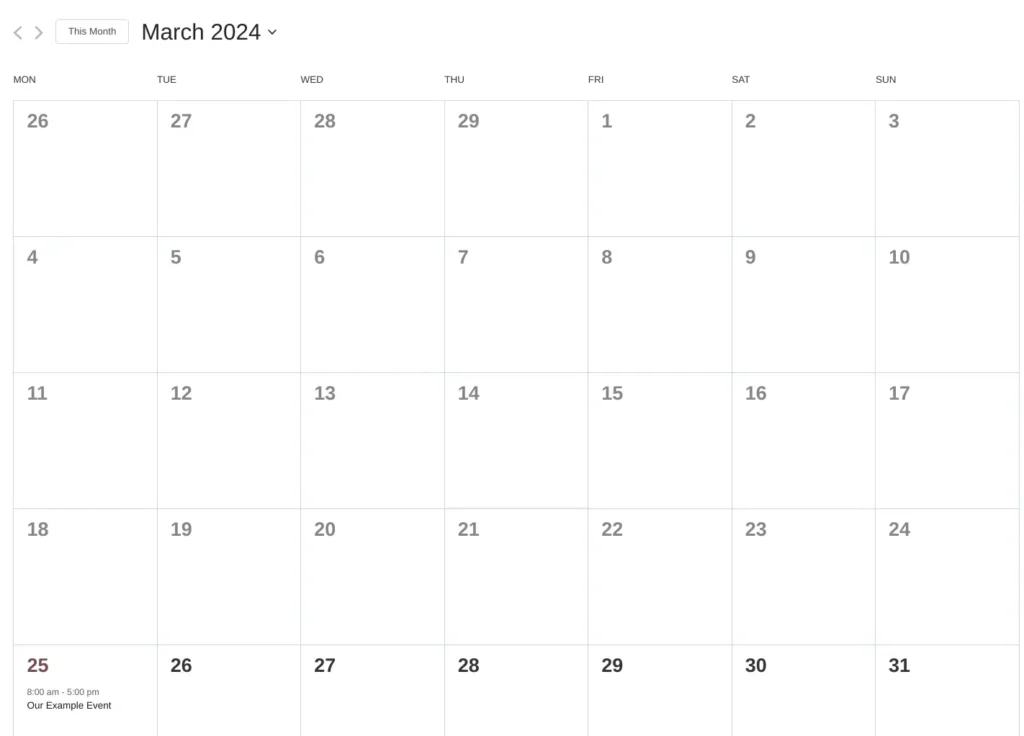
Let’s see how the events calendar looks on your website.
Simply hover on the Events and then click on the View Calendar button from the top bar menu.

You can also access the events calendar on your website by visiting yourwebsite.com/events.
Conclusion
The Events Calendar is the most popular and trusted WordPress plugin for creating an events calendar on your website.
Its free version is more than enough for most users; it comes with all the essential features they need to create and manage events and an events calendar.
Its Pro version includes advanced features such as recurring events, additional calendar views, advanced widgets, an events manager, and location-based search.
Adding an event category and event to your WordPress website is now easier than ever with The Events Calendar plugin, as you have seen in the above sections.
So I hope this blog post helped you create an events calendar on your WordPress site using The Events Calendar Plugin.
Read More:


