Do you want to add wishlist in woocommerce? Do you want to enhance your WooCommerce store functionality by adding a wishlist button to your woocommerce store? In this tutorial, I am going to show you how to add wishlist in woocommerce. so for this functionality, I will be using a simple and easy-to-use plugin so you don’t need any coding knowledge. All you have to do is just install and use the plugin. We’ve tried to keep this tutorial as simple as possible.
So I hope you’re ready. let’s jump into the details.
Short Answer
Here you will get a short answer on how to add wishlist in woocommerce. Go to WordPress dashboard, Navigate to “Plugins“ > Click “Add New“ > and search for a plugin called “YITH WooCommerce Wishlist“. Install & Activate the Plugin. Then head over to the “YITH” tab on the left side of the WordPress menu, and click “Wishlist“. then Click the “Wishlist Page Options” tab, Copy the Shortcode and Create a new page with the name of Wishlist, Past the Shortcode there. and don’t forget to click the “Publish” button. Last but not the least, you have to add the Wishlist page in the Header menu. That’s it.
Why You Should Use A WooCommerce Wishlist Plugin
- This will give a nice experience to your visitors when they browse your products.
- Customers can add their favorite products to the wishlist, and they can buy them later.
- Customer can share their favorite products with their dear friends & Family.
- Customers can share their Wishlist products on Social Media, Such as Facebook, Twitter, and Whatsapp, etc…
- The owner of the store will get direct marketing because their happy customers will refer your store to others.
- Using a WooCommerce Wishlist plugin you can increase and boosts your sales.
- Your store will look more professional than others.
- This will help your users/visitors to easily navigate your site, and find their favorite products, and save them for later.
- Lastly, this yith woocommerce wishlist plugin has more than 900,000 installations, which shows it the best, top, and most used plugin in the industry.
How To Add Wishlist In WooCommerce
Now I’m gonna share the exact method of how to add wishlist in woocommerce. First, make sure that you’ve installed WooCommerce plugin on your site and you have added some products to your store, then it’s easy for you to add wishlist in woocommerce.
Step 1:
All you have to do is install the top wishlist plugin on your website, so Navigate to “Plugins“ > click “Add New“.
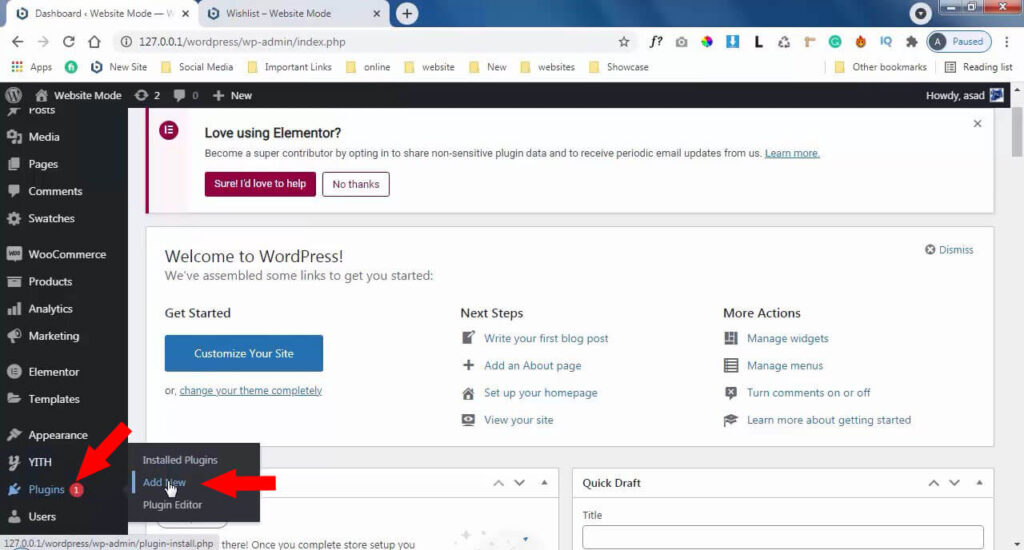
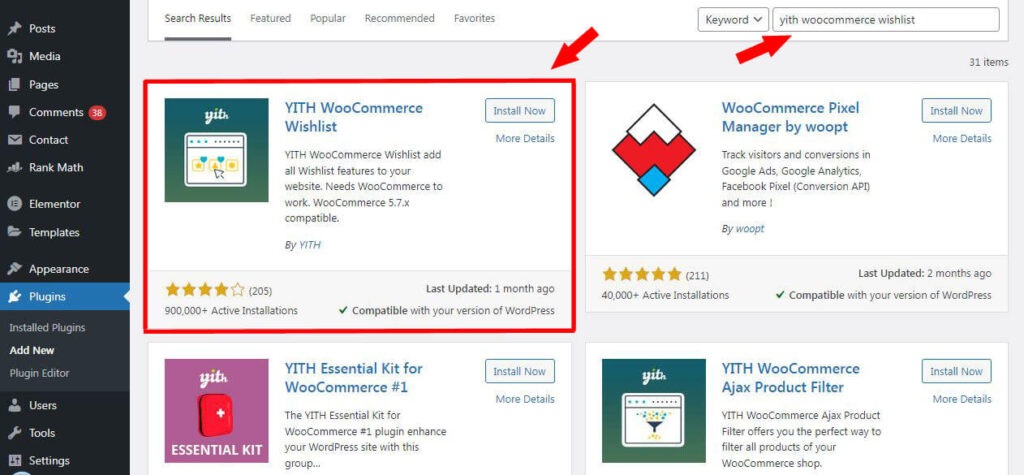
And here search for a plugin called “yith woocommerce wishlist“, Install and Activate the Plugin, (if you don’t click the Activate button, the plugin won’t work for you, so make sure after installation, click “Activate” button).
Step 2:
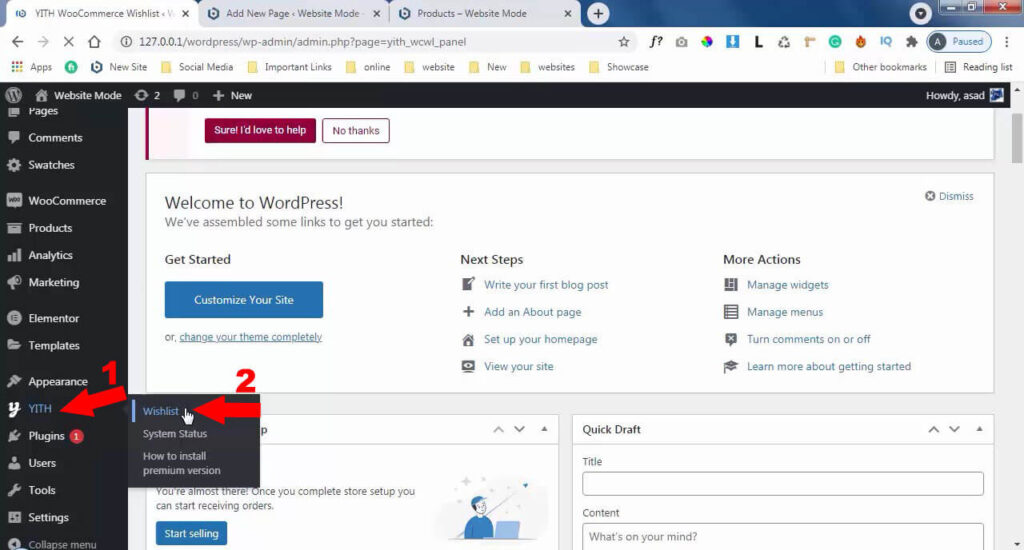
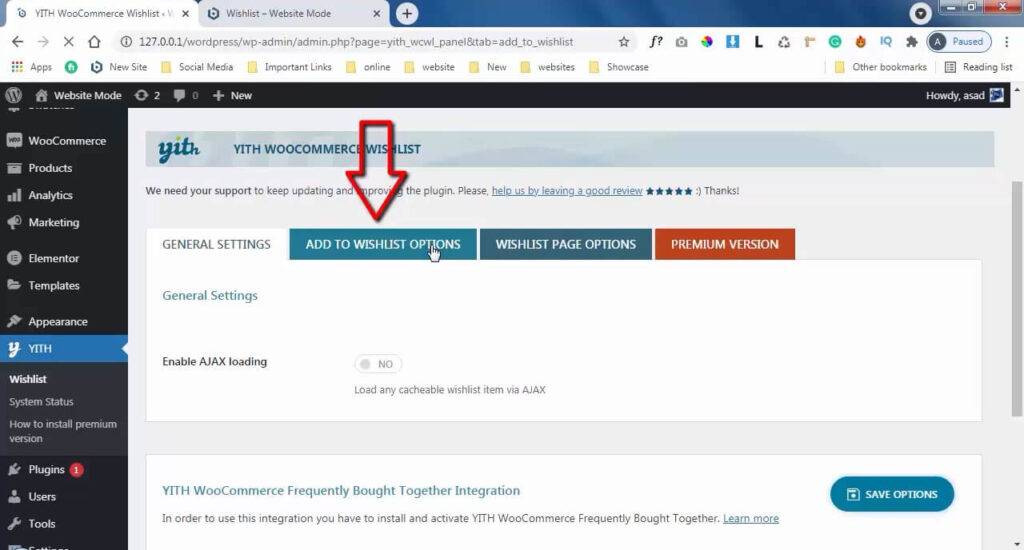
Head over the “YITH” tab, and click “Wishlist“.
Then click “Add To Wishlist Option” tab, As you can see below.
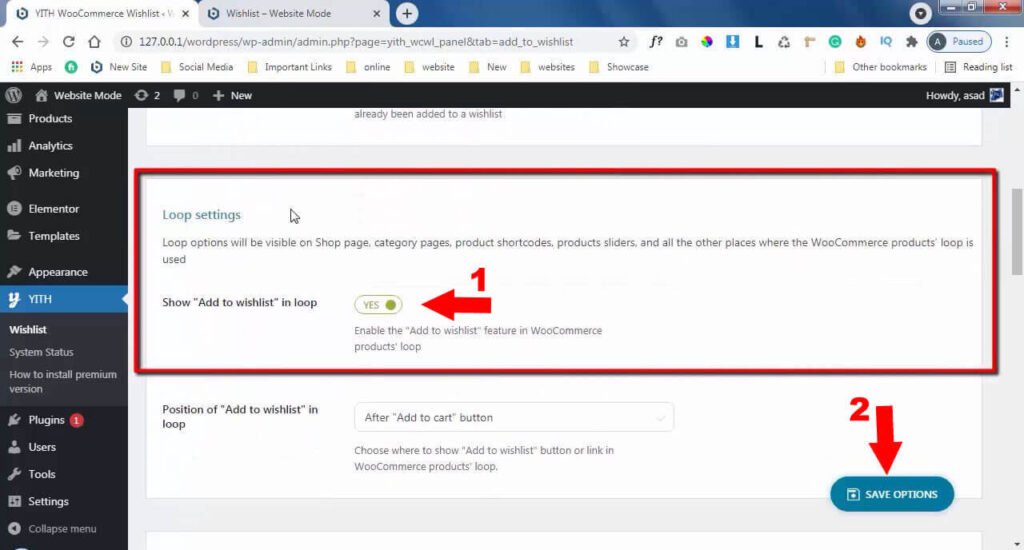
Scroll down a bit, and you will see “Loop settings” Section. So make sure that “Enable” the Show add to wishlist in loop option, and click “SAVE OPTIONS” button at the bottom to save the Settings. as you can see below screenshot.
Now add products in wishlist in woocommerce is fully working. but we have to create a page for wishlist products so that customers can see their favorite product on the wishlist page. Let’s create a Page.
Step 3:
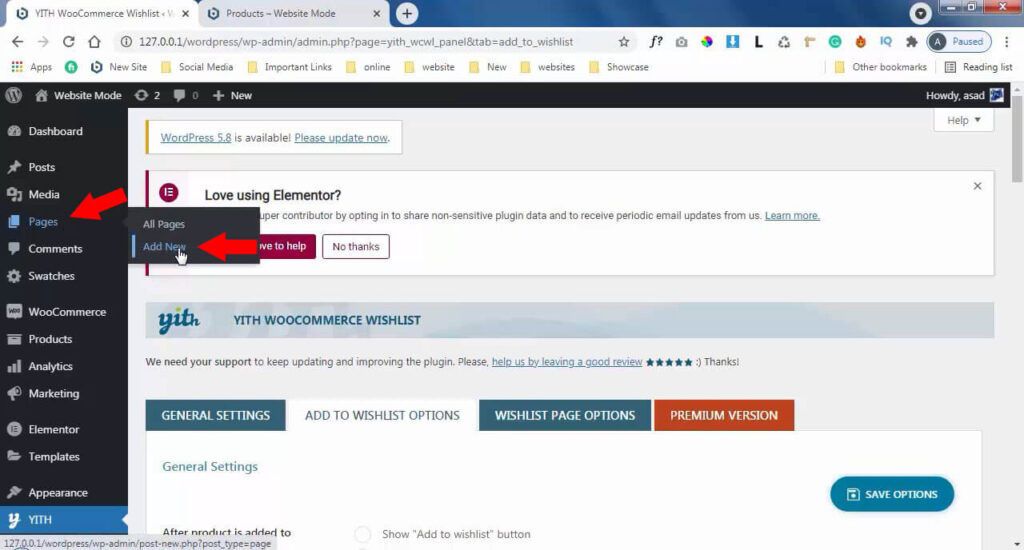
In the WordPress dashboard, Go to “Pages” > and click “Add New“.
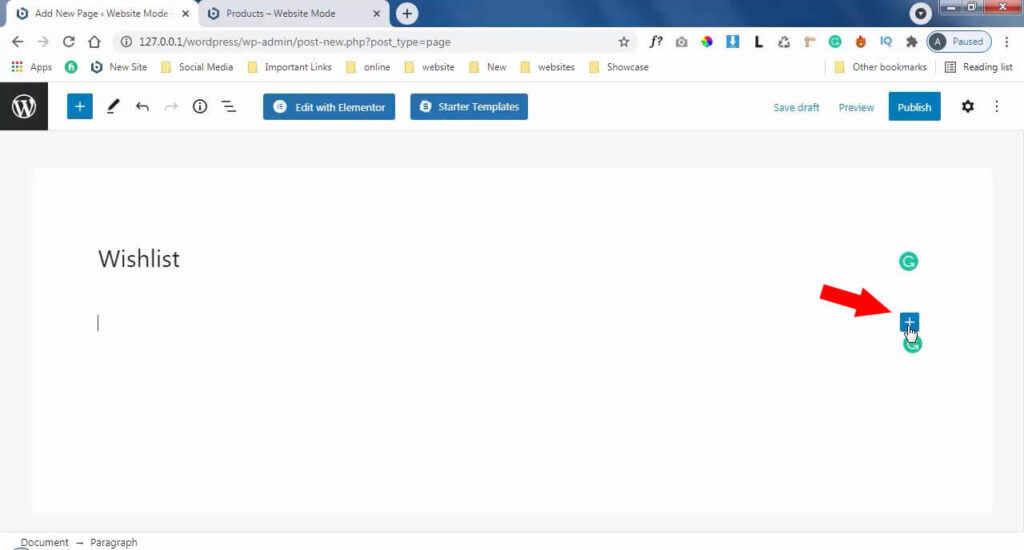
Enter a title for the page, Normally you can enter “Wishlist”. and the content area we will add a shortcode there, so click the “+ icon“.
And search for “Shortcode” in the search box. and click on the Shortcode widget.
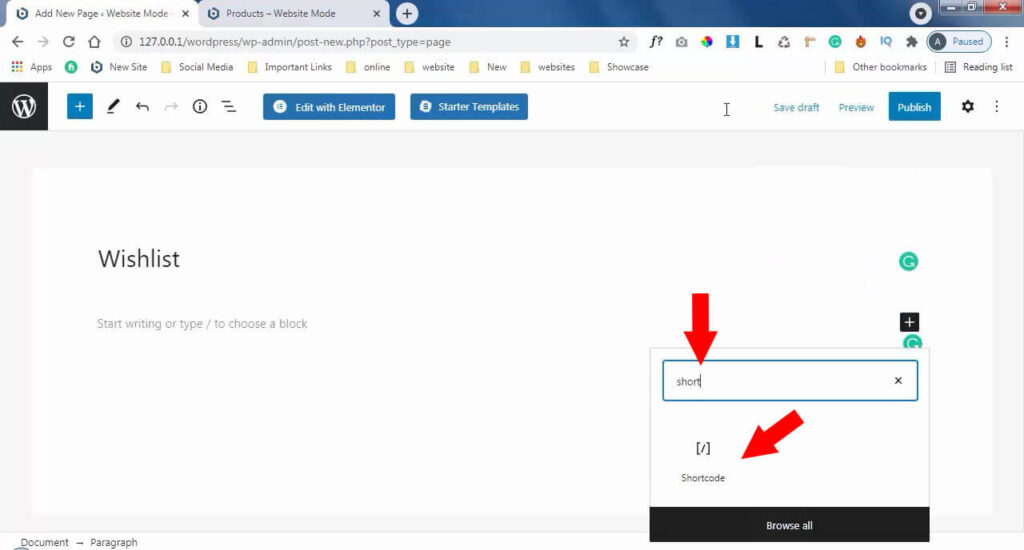
Next, We will Past a shortcode here, so Navigate to “YITH” tab, and click “Wishlist“.

Then click on the third tab, which is “Wishlist Page Options“. Here you will see a Shortcode, just copy the shortcode.
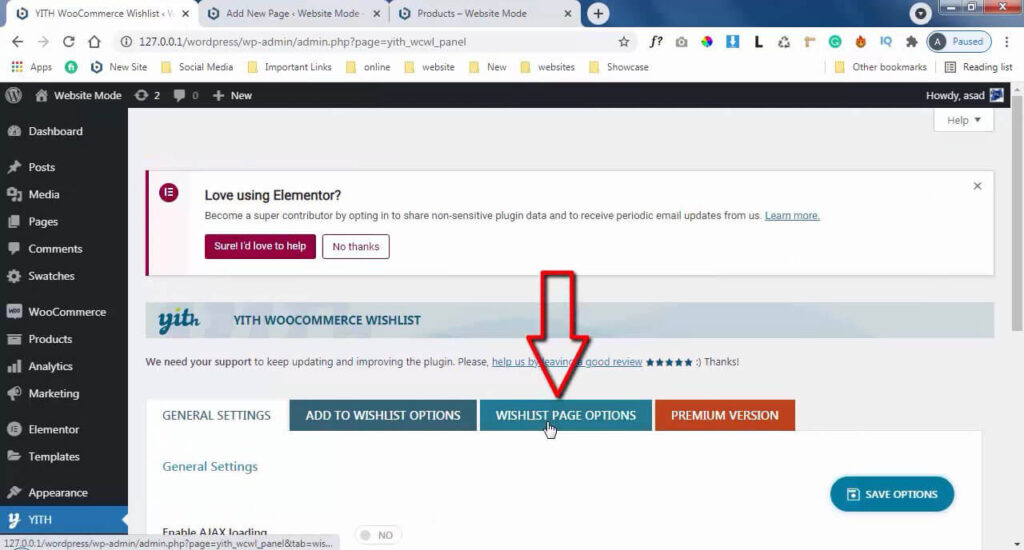
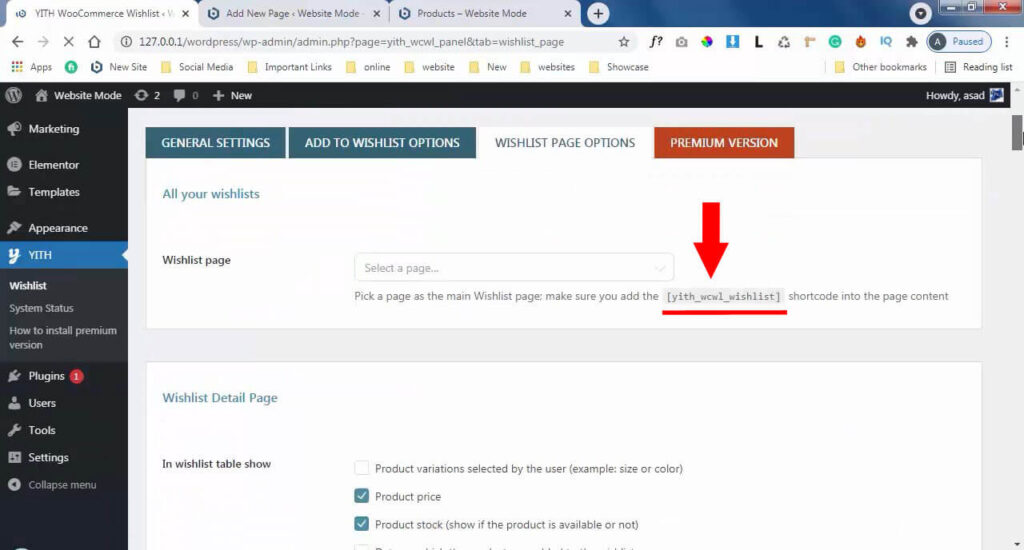
and go back to your page, and past it there. and Lastly, click the “Publish” button.
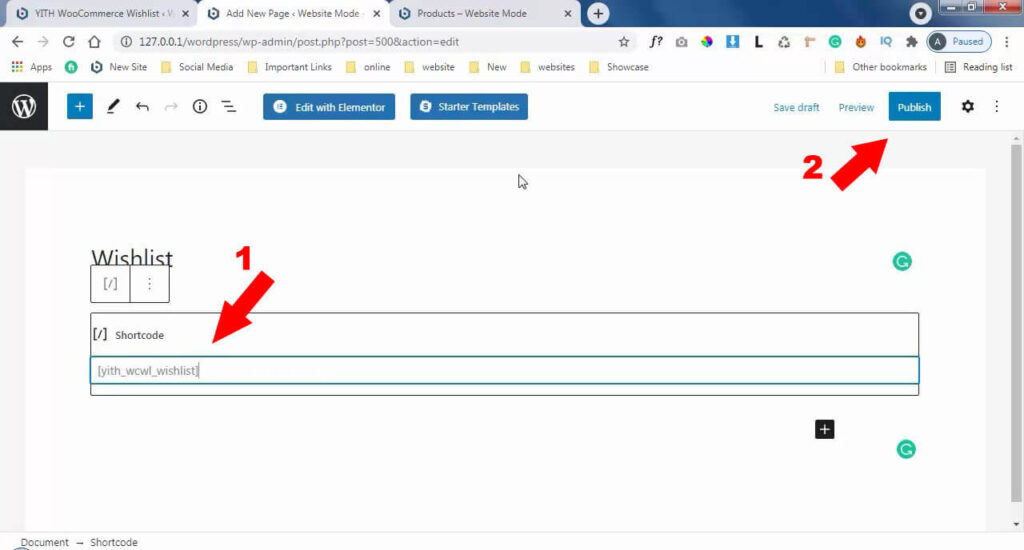
Step 4:
Next, We have to add this Wishlist page in the header menu, so this will help your customers to easily see their wishlist products.
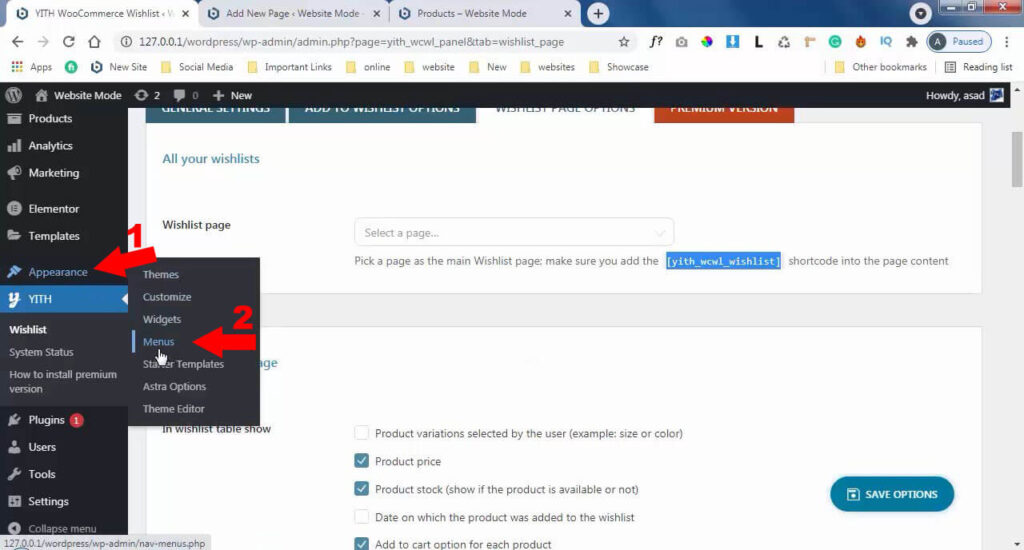
So head over to the “Appearance” > and click “Menus“.
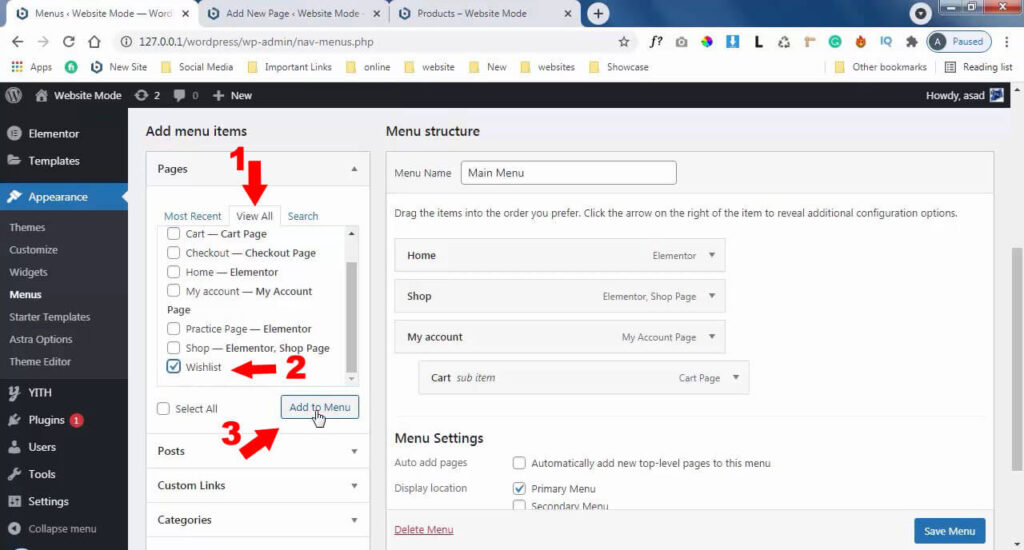
First, select your primary menu or header menu where you want to add the page. and click “Select” button. On the left side you can see the page section, click “View All” so you will see the all pages, then select the wishlist page, and don’t forget to click “SAVE MENU” button at the bottom.
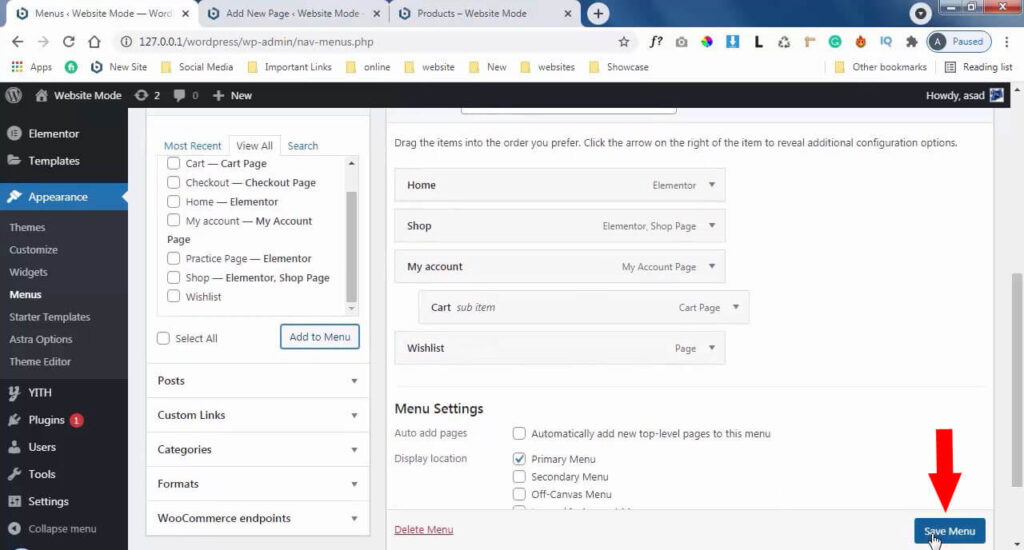
That’s it, Now we’ve done all the necessary things that you will need to add wishlist in woocommerce. Go to your product archive page or Shop page, refresh the page, and you will see an amazing button with Add to wishlist icon under every product.
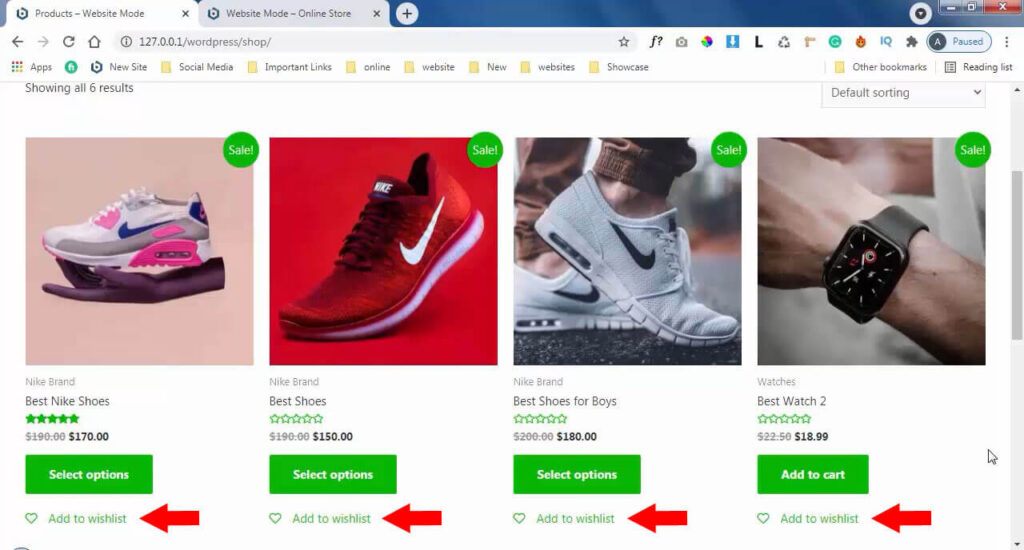
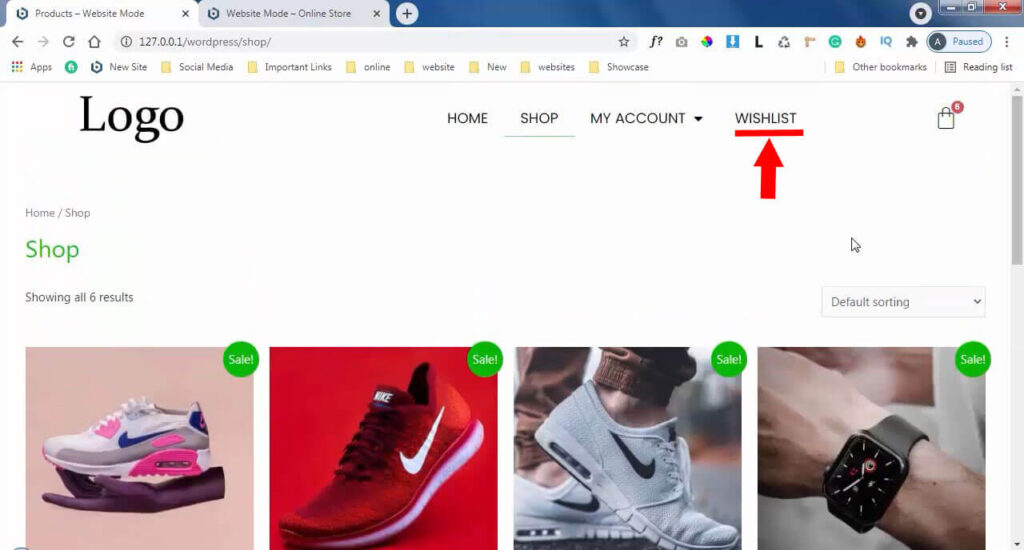
When someone clicks this Add to wishlist button, the product will be added to their wishlist page. they can see all the products later. I have added some products to my wishlist, so I’m gonna share them with you, first go to the Wishlist page at the header menu.
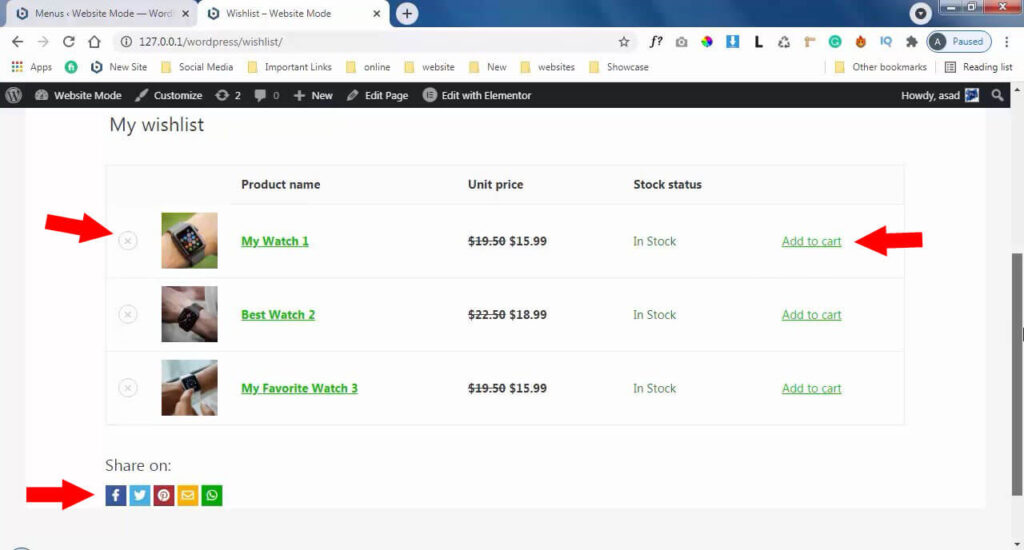
Even if a user wants to remove a product from wishlist they can remove it by just clicking the X icon on the left side with every product. and if a customer wants to buy the products, they can buy by just clicking the “ADD TO CART” button. And also your customer can share the products with their dear friends and family.
YITH WooCommerce Wishlist Plugin (Pro Version)
The FREE version of the plugin works well, but if you have the PRO version, that means you have the chance to add more features to your store. What you can do with the pro version, You can display a notice for unlogged customers, Allow customers to make as many wishlists as they want, Allow customers to manage the product quantity in wishlist, display multiple “Add to Cart” buttons, choose a nice layout for Wishlist page, send emails to customers and much more.
Check out the premium version With 100% Money back guarantee.
Related Tutorial:
How to Flip Product Image on Hover in WooCommerce.
How to Hide Price Range for WooCommerce Variable Products.
How To Add Quick View In WooCommerce.
So try and use yith woocommerce wishlist plugin, and let me know in the comments section, I’d like to hear your thoughts.
So I hope this article helped you learn how to add wishlist in woocommerce. You can also follow us on Instagram, Facebook, Twitter. You may also want to get .COM Domain for $5.98/year at Namecheap? OR want Hosting for your WooCommerce Store.

